Things I write about!!

80's (1) Apron (2) bad day (1) Ballet (1) budget (1) cake (1) Child (1) children (1) Competition (1) cruise (1) Dance card (1) Dance of revenge (1) Dress up (1) failure (2) feral (1) fun (1) gardening (1) Giveaway (2) goals (2) handmade (1) heart (1) help (4) Lego (1) love (1) meals (1) mother guilt (1) Painting (1) Party (2) Patchwork (1) pay it forward (1) peace (1) Play (1) review (1) Routine (1) sahm (1) school (1) self esteem (1) sewing (2) Share (1) shopping (2) shorts (1) Sun Dress (4) T-shirt (1) Thai cooking (1) time (1) Tutorial (5) vegtables (1) volunteer (1) weight loss (7) winner (1)
Showing posts with label Tutorial. Show all posts

Feb 9, 2011

Thursday Review......Thai Garlic Chicken

So according to my new Blogging routine today i need to review something. Now i had mentioned i had been to the movies to see BLACK SWAN and that today i would write what i thought however i still don't know what i think!!! My friend had asked me if i wanted to go see a ballet movie so i was expecting a light hearted movie about ballet not BLACK SWAN. Don't get me wrong it was a brilliant movie, The acting was spectacular, the film work great and the story fantastic but when you go to a movie expecting one thing it is hard to understand the movie you get. I think i need to watch it again now knowing what it is to really appreciate the depth of the story. I do however recommend it even if it is a little scary!!!!

So today i have decided i really want to tell you about a recipe i have found. I love it!!!


My girlfriend just had a birthday so we decided to get her a Thai cooking class for her present. There are 2 things main things that is fantastic about this present.

The first great thing is that it is a time to get everyone together. It was a class for 4 people so it made us drop everything and spend time together. I'm sure we all know how hard it is to get together with your girlfriends without everything else getting in the way. And to have us ALL in the same room at the same time was fantastic.

The second great thing about this is that i learnt how to cook Thai. It was great. We learnt Money bags, Pad Thai, Deep fried ice-cream and Garlic chicken. The garlic chicken impressed me. I have cooked it 3 times since our class. There is just so much to love about it. It is cheap. It is yummy and it takes no time to cook. However i do feel sorry for the local Thai restaurant as they have lost some of my business.

Since i have stopped work our income has dropped and we have had to start budgeting. So take out is a luxury now. However this meal makes me feel i am having takeout without the expense.

so here it is........


GARLIC CHICKEN

oil
200gm Chicken (I use 1 breast or 2 thighs..... how cheap is that to feed a small family of 4)
1 head garlic (i also put in a bit of minced garlic......i like garlic)
1 leek
1 onion
1 carrot
2 tablespoons soy sauce (if you want to serve with rice put 4 tablespoons)
1 tablespoon oyster sauce (if you want to serve with rice put 2 tablespoons)
1 tablespoon sugar (palm sugar is a little nicer but normal white sugar works as well)

Slice everything up. Now one thing i learnt at the lesson is how to cut up leek.Cut it into three, Then cut the chunks in half, Then slice it into slices. Don't cut it into rings!!!!


Chop up everything else!!!

Chicken, Garlic (minced in the mortal and pestle) Onion, Leek and Carrot.

heat the pan and oil. I Like the idea of gas cooking but i have an electric cook top so i decided that for this meal just to make it special i would get out the camp cooktop and bbq wok we have but never use.


 put in chicken and garlic. cook. then put in the vegetables and sauces. It only takes about 3 minutes to cook. When the carrots are a bit soft serve.


Now as i said in the recipe if i am just cooking this for the hubby and I I will serve as is with no rice so only use a small amount of sauce. But if i am making it for a family dinner i like to bulk it up with rice and the rice soaks up the sauce and makes it not as tasty so double the amount used. 

So for my review.......

Any meal that gets this response from a three year old after 3 serves deserves 5 stars out of 5

Look at that bowl. It is clean......

1) I love this meal as it is healthy. It is a great meal for all those trying to slim the waistline.
2)  It is quick. When i cooked it the other day it was annoying because i was ready to cook but i had to wait for the rice to cook as this only takes a short amount of time. So it is great for the times you have no time.
3) It is cheap. You can feed a family on a breast of chicken and a leek!!!! 
4) It is delicious!!!!

So My review.......
Cooking class with my friends 5 stars
Yummy Thai garlic chicken 5 stars
a meal my 3 year old devours 5 stars
Black swan........Maybe 4 stars!!!!

Jan 26, 2011

Play Lego

Hi All.

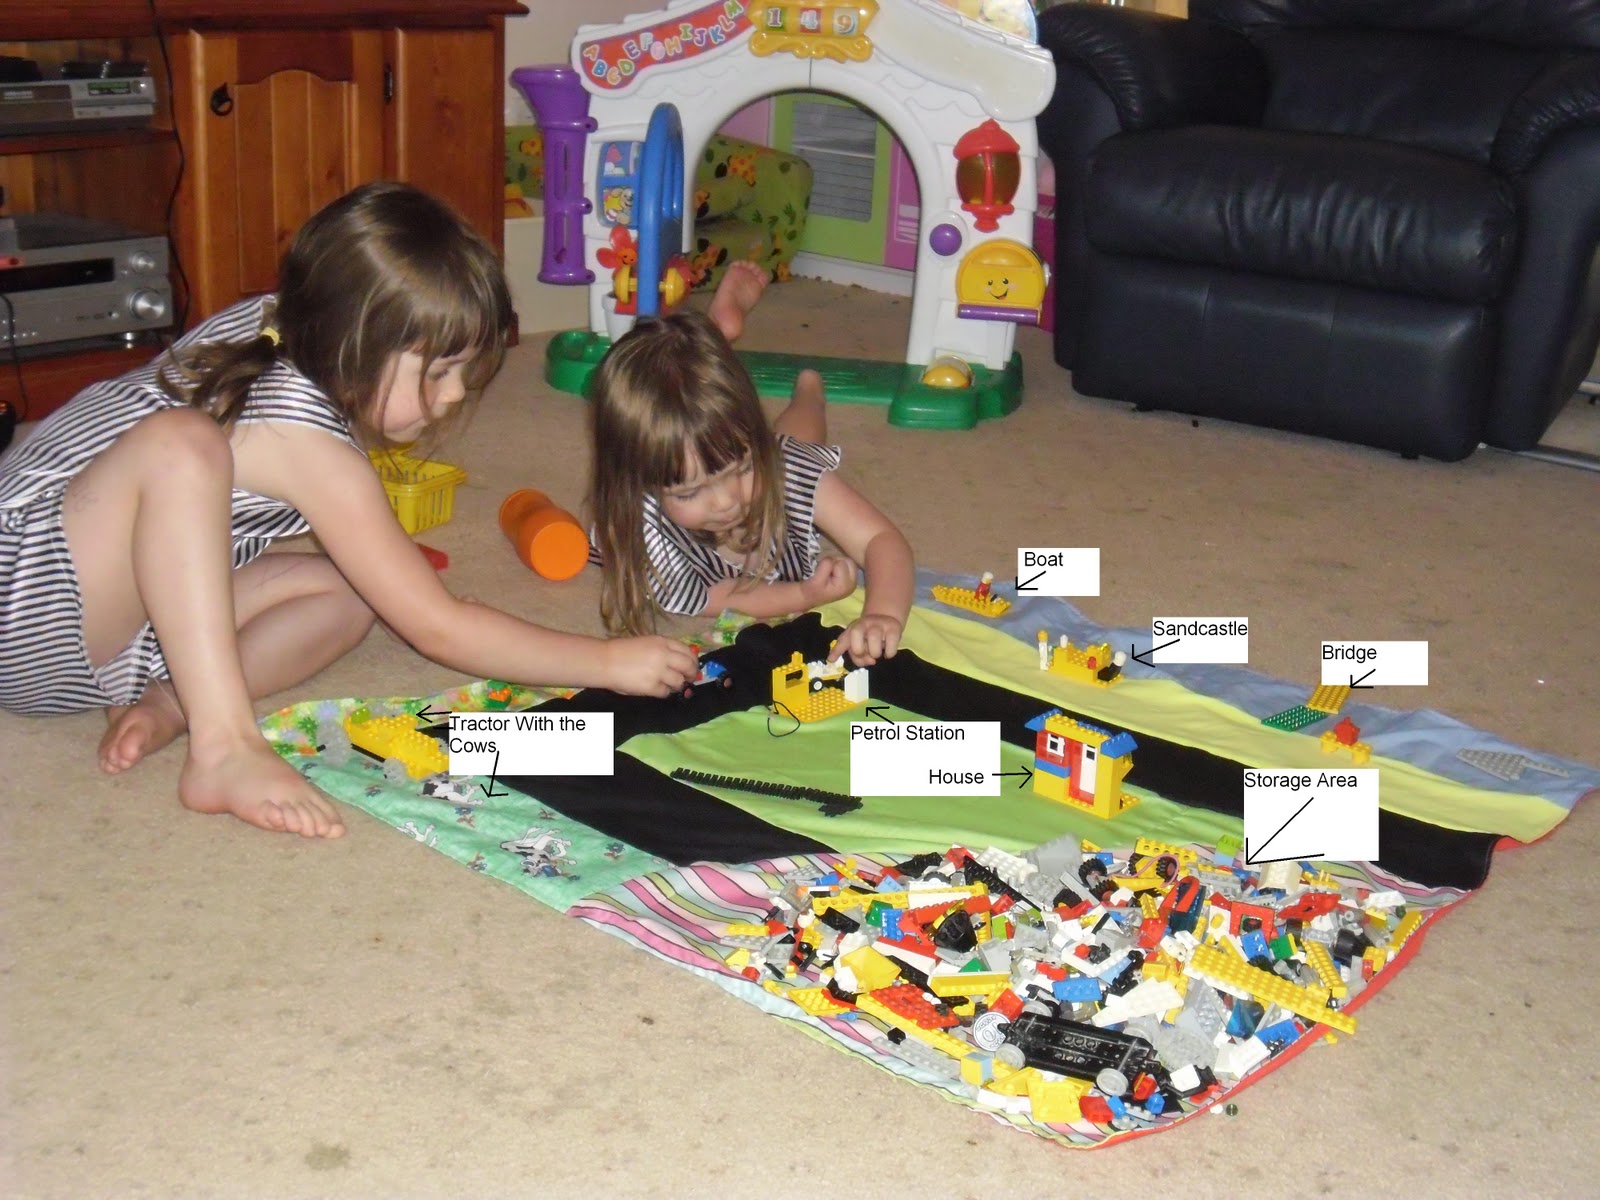
I love Santa however this year he decided to bring the girls Lego. Why Santa would think Lego is a good idea i have no idea however the girls love it. I however hate it because whenever they get it out it ends up everywhere!!! So this morning i decided to make a Lego Mat. I started out with a plan.......
I am such an artist........almost as good as Belly!!

The plan is...... the pink at the top left corner is the storage area. You then have water and beach at the bottom, a road going around and green grass in the middle.

I then went through all my scrap material, I am getting quite a collection (still not as good as my mums however) and got out anything i thought would work.

And Turned this.......

Into This.......

Now i have no idea how to do patchwork so the next thing i did was just started at the bottom and tried to sew them together as best as i could.
 I then backed the entire thing in red ( I had a fair bit of that) If i had time and energy i could have made a different scene and made it double sided ( That is your challenge!!!) but i couldn't be bothered!!!! (yes i am that Lazy!!!!)

And presto......


Now the best part of my Awesome Lego mat is that i then sat down for an hour and played Lego with the girls. 


I have labeled all the points of interest around Lego town Click to get a larger picture.

The Lego has now successfully been played with for an hour unsupervised and it is still in the one place
YIPPEE


Jan 24, 2011

Make a shopping List

Today i decided i needed to make a shopping list. One that is always in the kitchen and always has a pen near it. So here is what i did........

First thing i did was get a pen. You need a pen that doesn't have a hangy thing on it. Just a straight pen. I then got a pin heated it up and burnt a hole in the top. Wriggle the pin around to make the hole as big as you can.  Then thread wool Through the hole.......I had to tie it onto fishing line to guide it through the small hole.

Here is a picture Belly drew of me putting a pin through the pen
Aren't I pretty!!!!

I then Cut 2 rectangles of material. The size is going to depend on your pad But make the front one a little smaller.
I had some Padding stuff lying around so i ironed on a layer. You could use interfacing or something as well. It just gave it a bit of bulk.
Then sew the rectangle up so you have a pocket.

Then make a strap. And sew it into the opening of the larger pocket along with the end of the wool for the pen.

Sew the smaller pocket closed. Then sew the 2 together.
and Woolaa
One shopping list to hang in the kitchen with pen attached.

The first one i made was a bit small so I have now introduced Belly to the dance card....... She loves to play princes at the moment so now she has a proper dance card.......
And Elmo is her first prince.

Jan 13, 2011

Sun Dress

Hi All (Which I'm Still Pretty Sure is still no-one)

Today I made another Sun Dress So thought i would share.

First thing i did was get a rectangle of material the height is roughly how long i wanted the dress. Next measure across the back, Under the armpit from side to side. Then across the chest. Now cut your rectangle of material into 4 peices like this.......
The 2 on the left will be the straps, This middle is the front....To cut this piece take your front measurement and add 10 cm or so (for the pleat) The one one the right is the back this is the same as the back measurement.

Next i cut the top off the front and back to create a band at the top
Then Attached it to the 2 body pieces


Make sure your bands are the same size.
 Sew Up the sides
Next mark out the center of the front piece and put it on your model!!! Now here is the best tip you will ever get when making clothes for children..........

LET THEM STAND ON THE TABLE!!!!!
They think it is such a treat that they stand still and don't run!!!!
Now Work out the pleat so it looks good
I then Sewed a little line down my pleat.....NOTE: Do not sew your pleat down or you won't be able to get the dress on. I just sewed a little so when it goes on the pleat knows where to sit.
I then put buttonholes on the pleats to put the ribbon through. I actually used a tube of the fabric but a pretty ribbon would look good as well.
Then Get your straps. I pleated my straps as i think it adds a little class.
Again put it on your model (Mine was trying to watch the princess and the frog at this stage) Attach you straps and fix the hem. (Just so you know it does fall nicer once the straps aren't pinned)

Then You Get .......

A Pretty Sun Dress!!! (My model was feral at this stage and was put to bed!!!!)

Hope you enjoy!!

Jan 10, 2011

T-Shirt Dress

I made a pretty little sun dress for my 3 year old the other day. The only problem is she can't wear it to day care because it has no shoulders in it. People keep telling me to put a T-shirt under it but i don't see the point in adding an extra layer to clothes that should be cool and light........ So i decided to add half a T-Shirt to it. 

I have recently been through my cupboards and collected all the clothes that no longer fit me. So i found an old workout shirt that matched really well!!!

My Old Shirt And the Summer Dress I made (I will Show them later or there are plenty of patterns on the net for Shirred sun Dresses)

I Cut Out 2 Half Shirts ( About the size of a crop top) My Pattern is traced from one of Flicks shirts.

See!!!!

Now Sew the shoulders together then cut out 2 sleeves
Then Sew them Onto The Crop Top.

Then Sew Under The arms and down the body of the shirt. This is how you make a normal t-shirt as well it would just look longer!!


This is the first T-Shirt I made (i mainly put it in because i don't want the next picture to be the first picture you see of my 3 year old!!!!)


I Then Put the dress and the shirt on my model and pinned it so it looked good, Sewed the two together, hemmed the sleeves and neck line. Then Woolaa This is what you get!!!!

One Feral child in a pretty, practical, sun smart dress!!!!